Birds BI for Fabric solution developed by Dynalogic is a implements a optionated method for implementing a medallion architecture based on a Dynamic ERP source.
Birds BI Features
Birds BI quickstarts your journey in Fabric by providing a optionated medallion architecture within Fabric.
- Use our Birds BI for Fabric Framework to automate extracting and loading data into a silver lakehouse. - We have connectors available for modern Dynamics ERP solution like BCSAAS, CE and D365FO.
- Quickstart your gold lakehouse and semantic model by implementing one our content-packs.
- Use our Birds BI Fabric Workload to customize the gold lakehouse with various T-SQL based components.
- Finally we provide quickstart reports based on the content-pack implemented to show immediate results on your dashboard.

Birds BI Workload
In our trial experience within Fabric you get access to our content editor, and can try out how to build components for the gold lakehouse. For the full experience you will need a license. Contact us at [xxx].
How to start our workload
After logging in Microsoft Fabric you are redirected to the homepage of Fabric. To open our workload you must create an item.
In Microsoft Fabric, an item is a broad term used to describe various entities stored within a workspace. Common built-in Fabric items include Notebooks, Lakehouses, Data Pipelines, Reports, Dashboards, and Datasets.
Each of these items represents a specific type of resource used for data engineering, analytics, or visualization.
Our custom item provides a streamlined, tailored experience for Fabric users, enabling them to quickly customize and configure their components within Fabric.

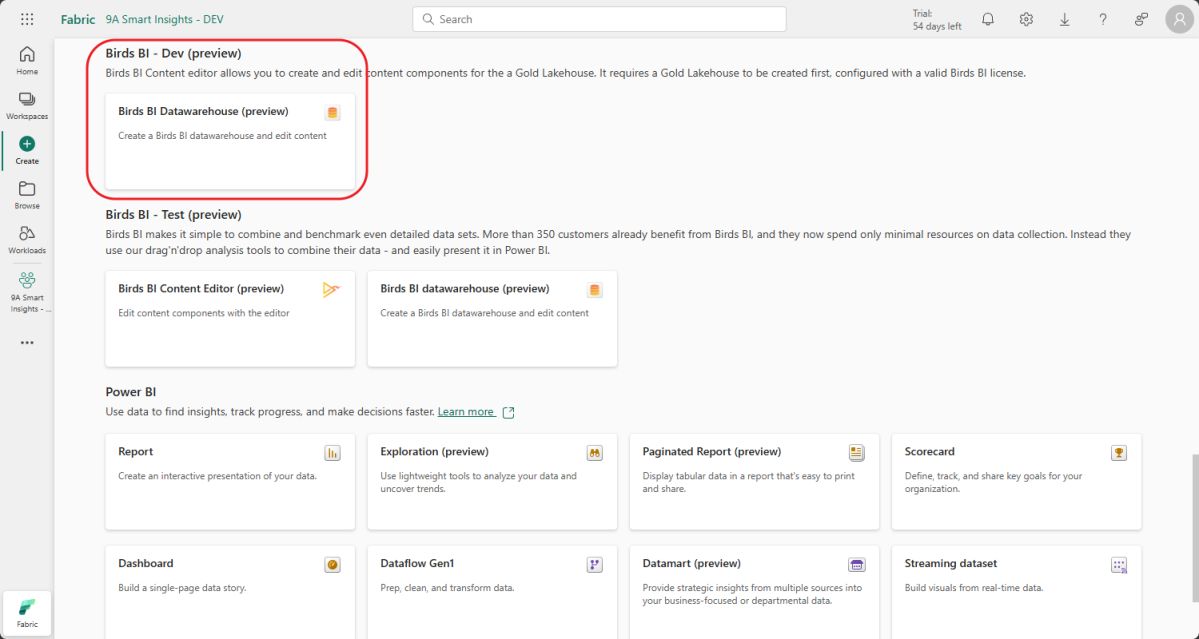
If you're not in the correct workspace, select it by clicking on [Workspaces] in the left sidebar. Choose the appropriate workspace with a valid capacity. Click on `create` to create an item, when the workload is active a `Birds BI Datawarehouse` item should be visible.
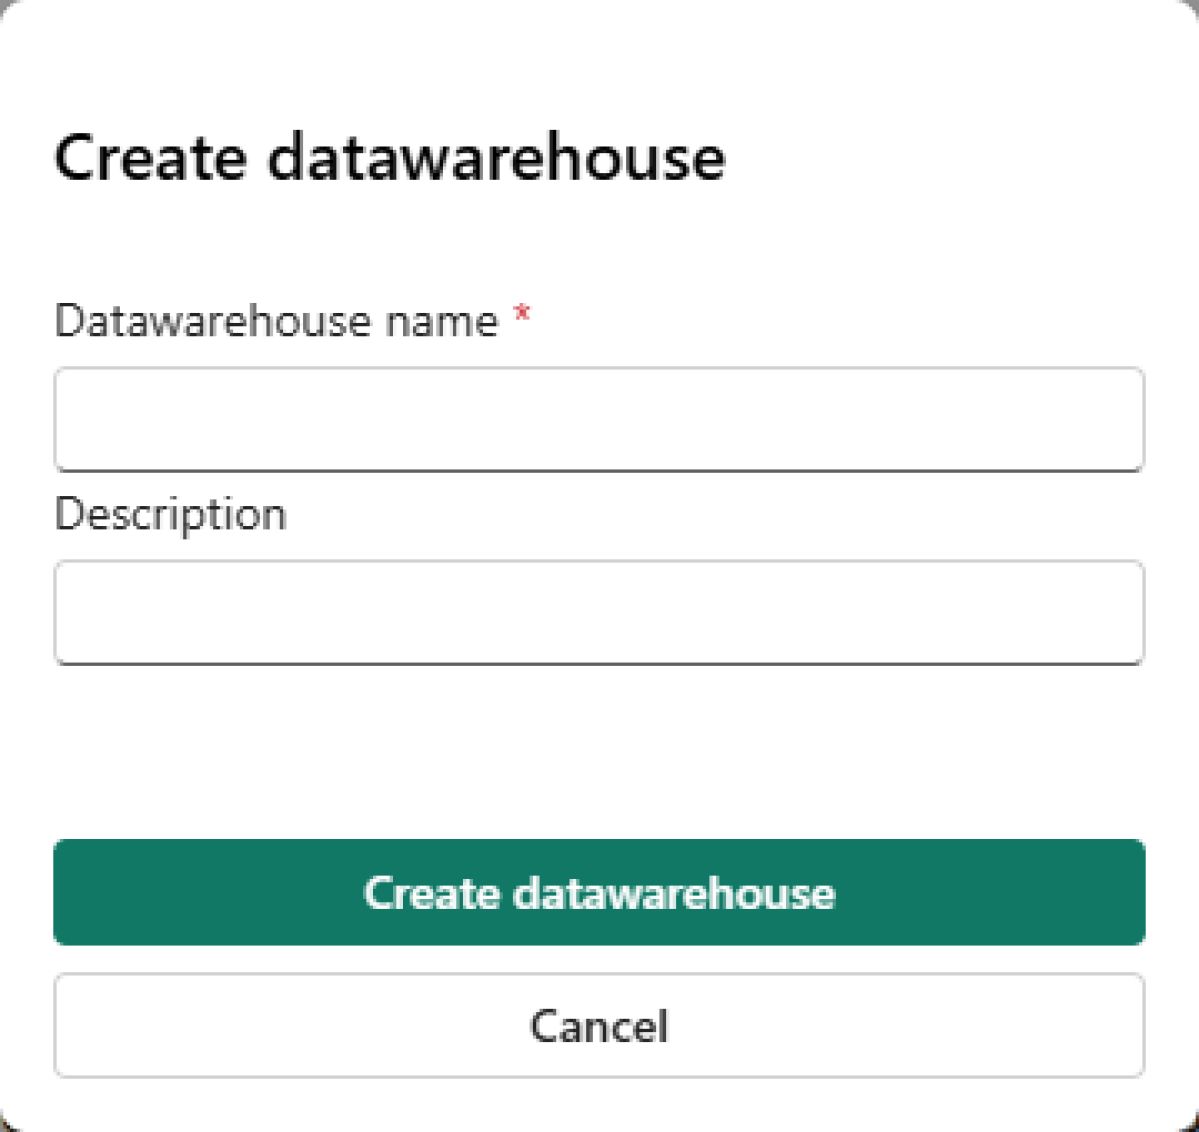
A dialog will appear, prompting the user to enter a name and an optional description.
After clicking `Create a datawarehouse`, the item is created. Next, you need to select the Lakehouse where the pre-installed content resides. !!! info Lakehouse selection required Currently, you need to select a Lakehouse since the item is not yet connected to one. This will be improved in a future iteration.
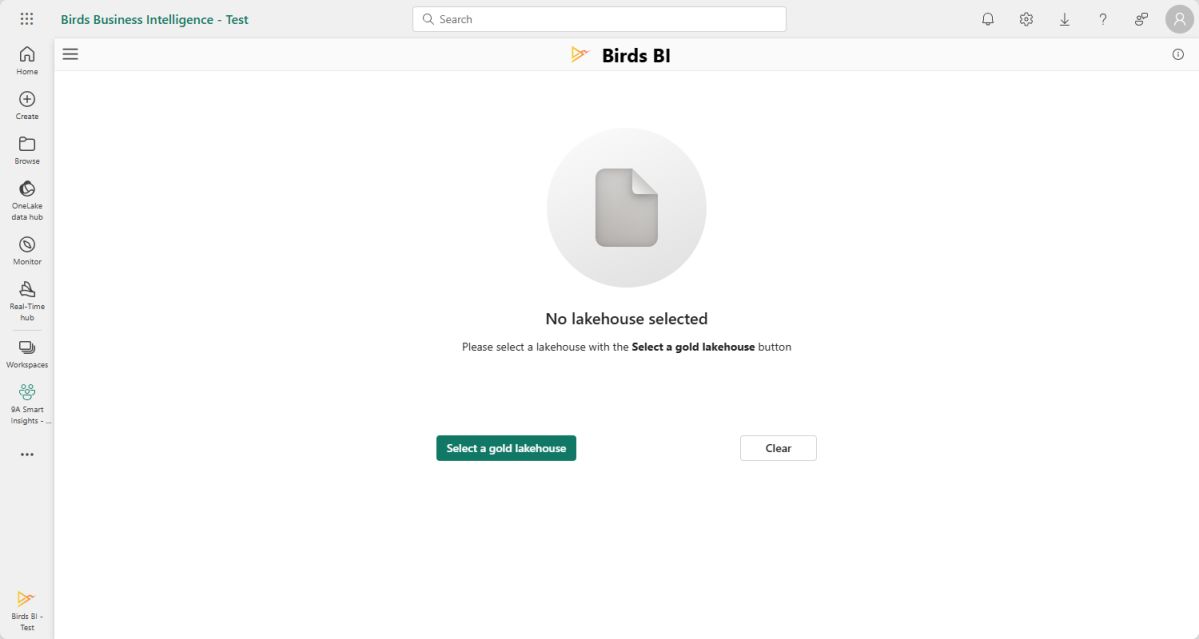
To edit content, we need to know which lakehouse the content is installed in. Therefore, we ask the user to `Select a gold lakehouse`. The `OneLake Datahub` will pop up; please choose the gold lakehouse where your content is installed. You can either double-click on a lakehouse or select it and click on [Connect].
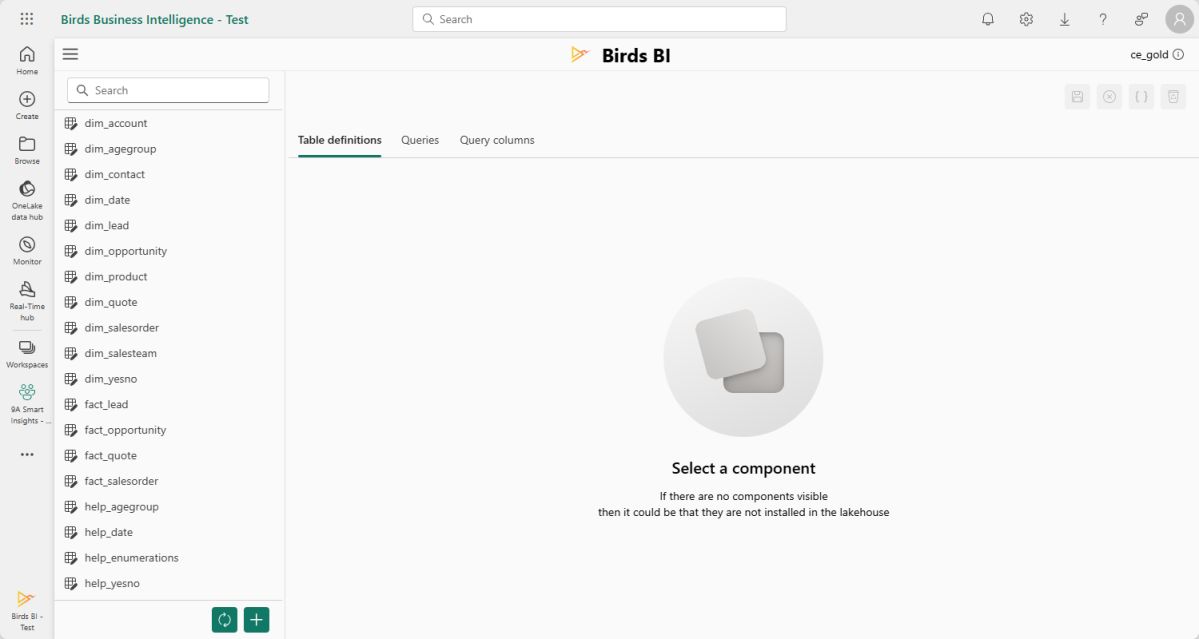
The content from the lakehouse will be loaded, and the components will be displayed in the component list on the left-hand side.
Now that you have successfully opened a lakehouse, we will proceed with some key functionalities.
Mainmenu
If you click hamburgermenu on the top left.
The mainmenu will be opened.
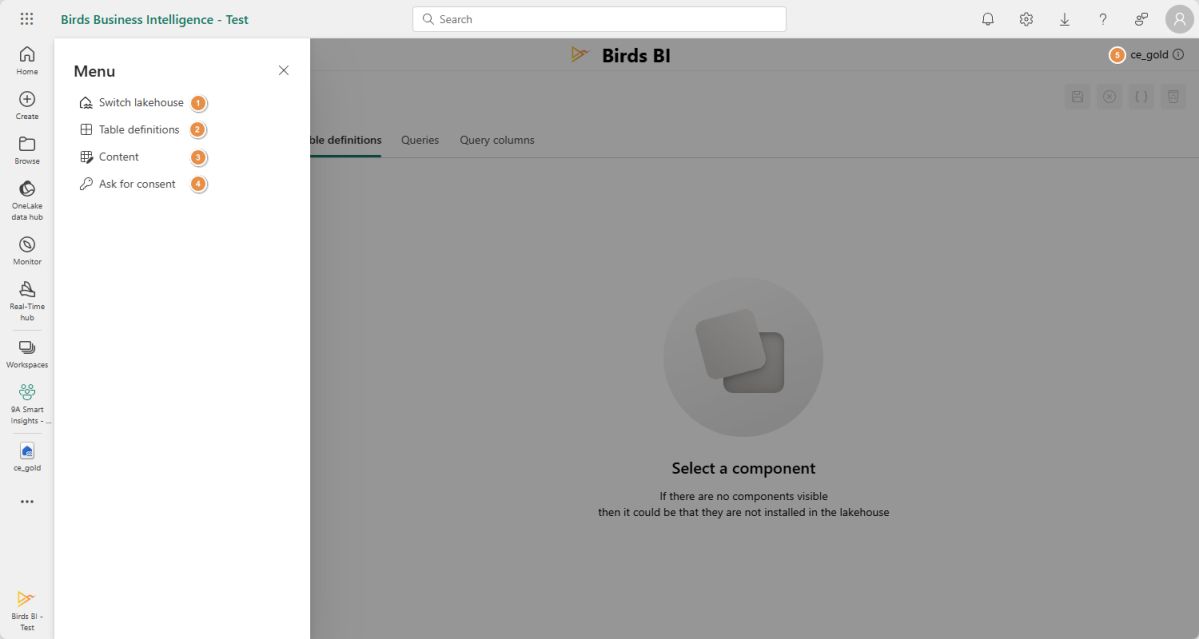
Here you can select these options
- Switch lakehouse
- Table definitions
- Content
- Ask for consent
- Lakehouse information
Switch lakehouse
Here you can switch from lakehouse, or clear the selection.

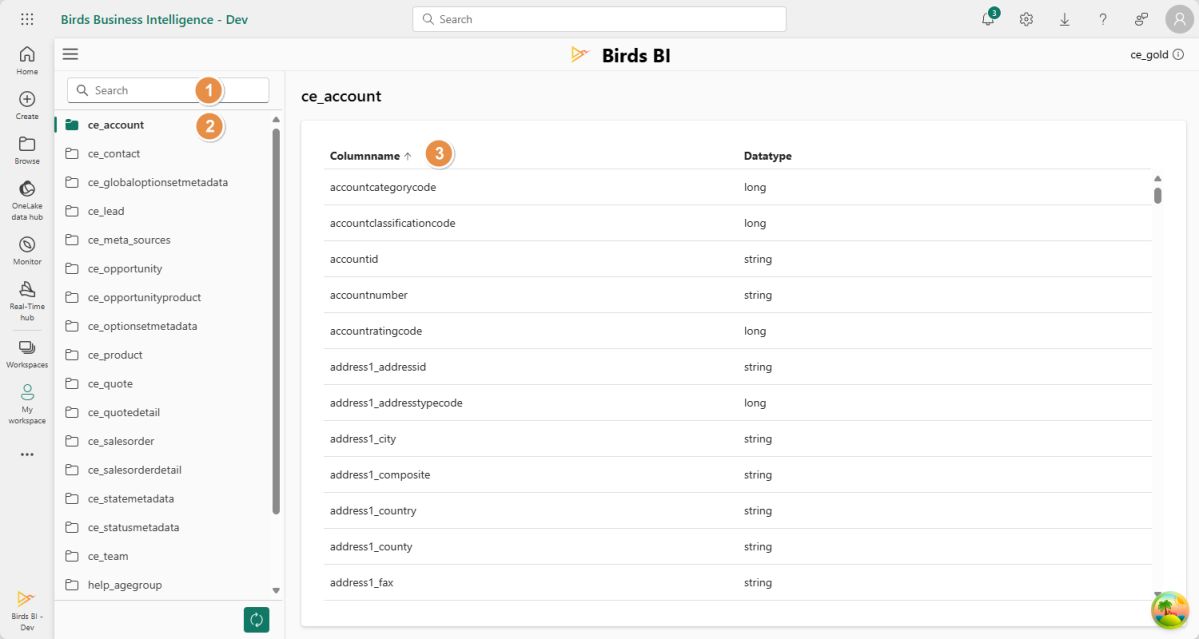
Table definitions
When you open the table definitions, the table definitions installed in the lakehouse will be displayed. You can view these table definitions in the table definition list. Important features include:
- Searching for tables using a 'contains' function.
- Selecting a table to view columns and data types in the main section.
- Sorting by column name or data type.
Content
When you open the content page the content from the selected gold lakehouse will be displayed. On the left-hand side a componentlist and on the right-hand the details of the component.
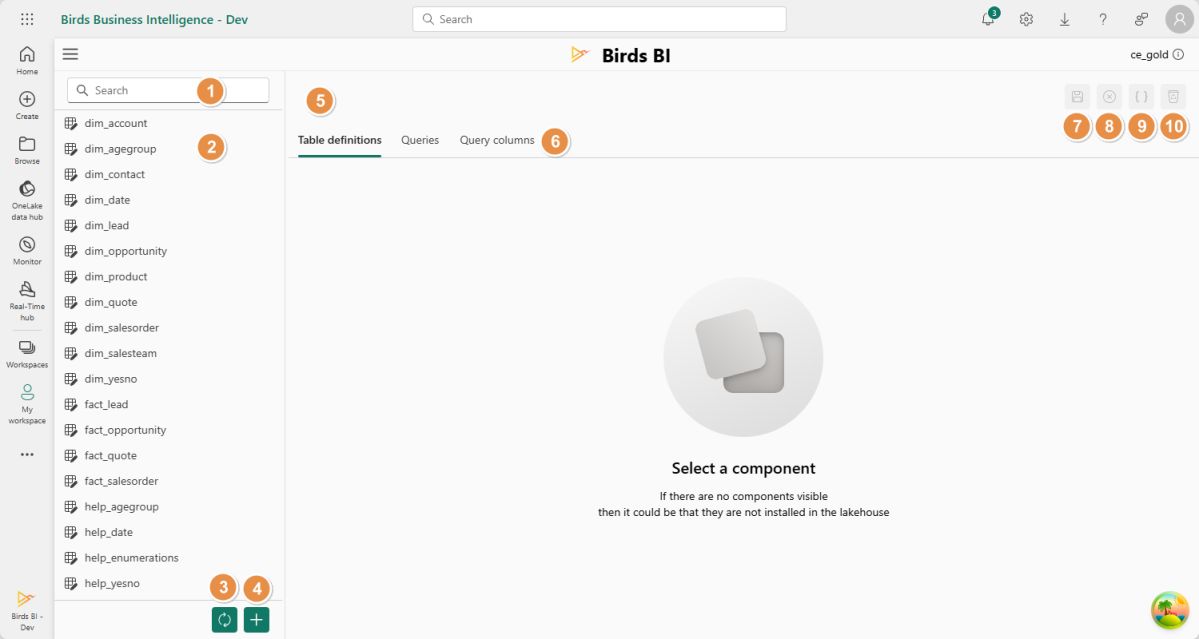
1. Searching for a component
You can type any character into the input field, and it will search the component list for matches, ignoring case sensitivity.
2. Selecting a component
When you select a component, its details will be displayed on the right-hand side.
3. Refresh components
When you click the refresh button, the components will be fetched again from the gold lakehouse.
4. Adding a component
You can add a component by clicking the [+] button in the componentlist. Duplicate names are not allowed.
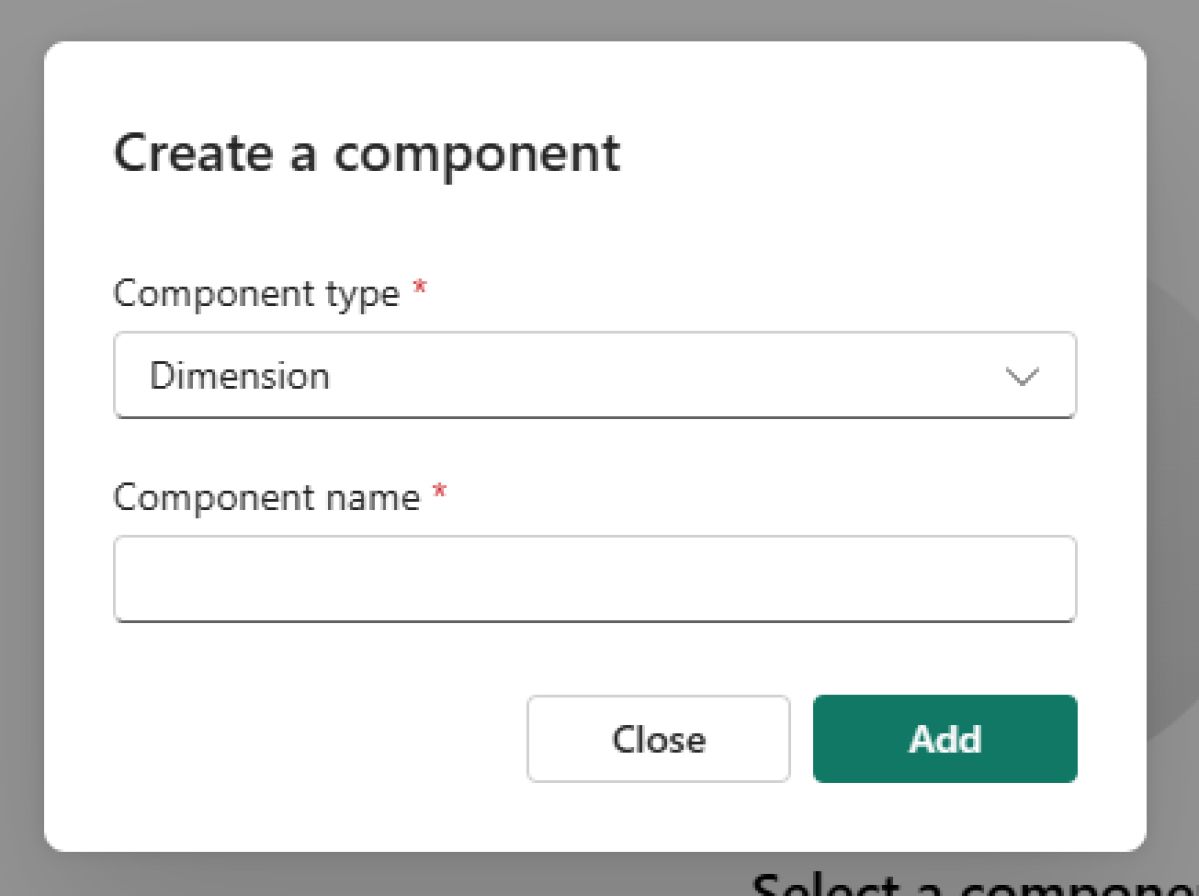
The dialog will prompt you to provide the component type and name. Both fields are mandatory, and the name must start with a letter or underscore, containing only alphanumeric characters or underscores.
When you click [Add], the component will be created in your gold lakehouse without any table definitions, queries, or query columns. When you click [cancel] the dialog is discarded.
5. Component name
The name of the component will be displayed here.
6. Componentdetails tabs
Here, you can switch between different component details, such as table definitions, queries, query columns, and dimensions (for Facts). We will provide more details in the next section.
7. Save the component
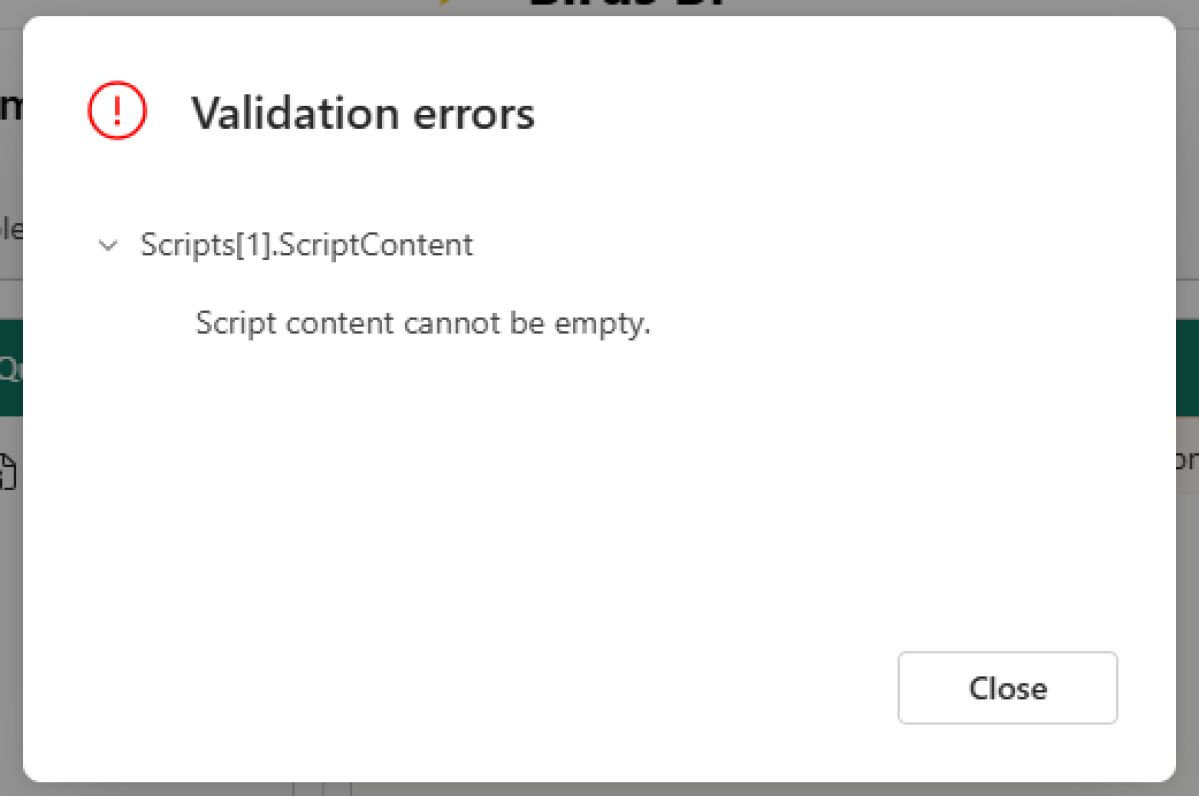
Save the component, this is only enabled when the component is changed. This is also the point where the in-memory changes are written to the gold lakehouse. During a save, validation errors may occur.
For example, the lakehouse might not exist, or the component may not be in the correct format. The following dialog will be displayed. Please correct the error and try saving again.
8. Discard the changes
Discard any in-memory changes made to the component. The file in the gold lakehouse remains unchanged.
9. View JSON
View the JSON of the current component; it also includes all the changes you made.
10. Delete the component
This action deletes the component from the gold lakehouse, and you must confirm it in the pop-up dialog.
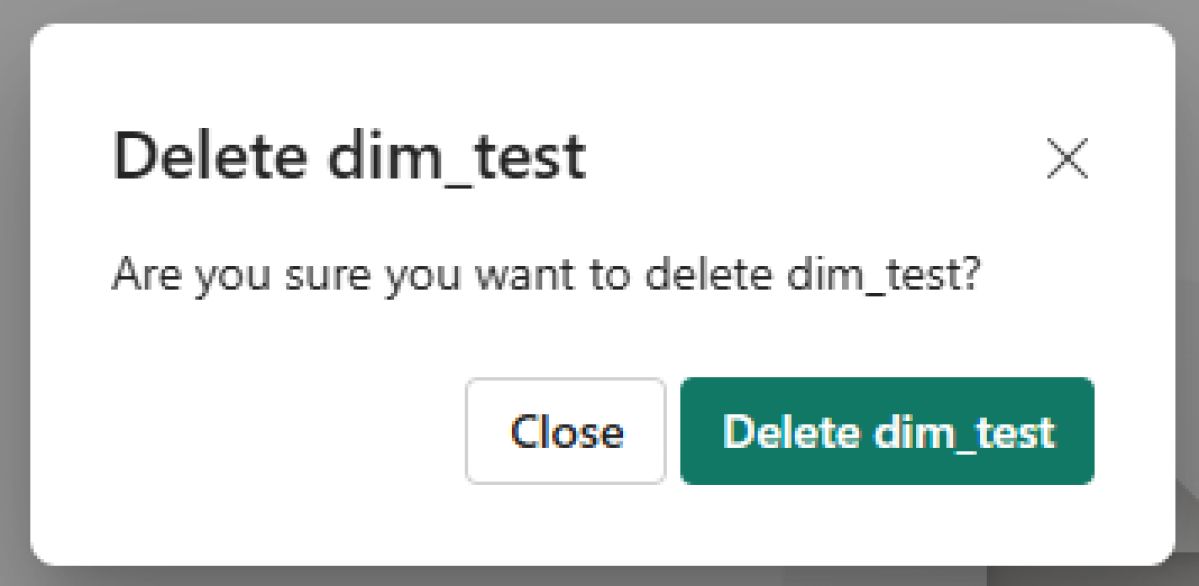
Table definitions tab
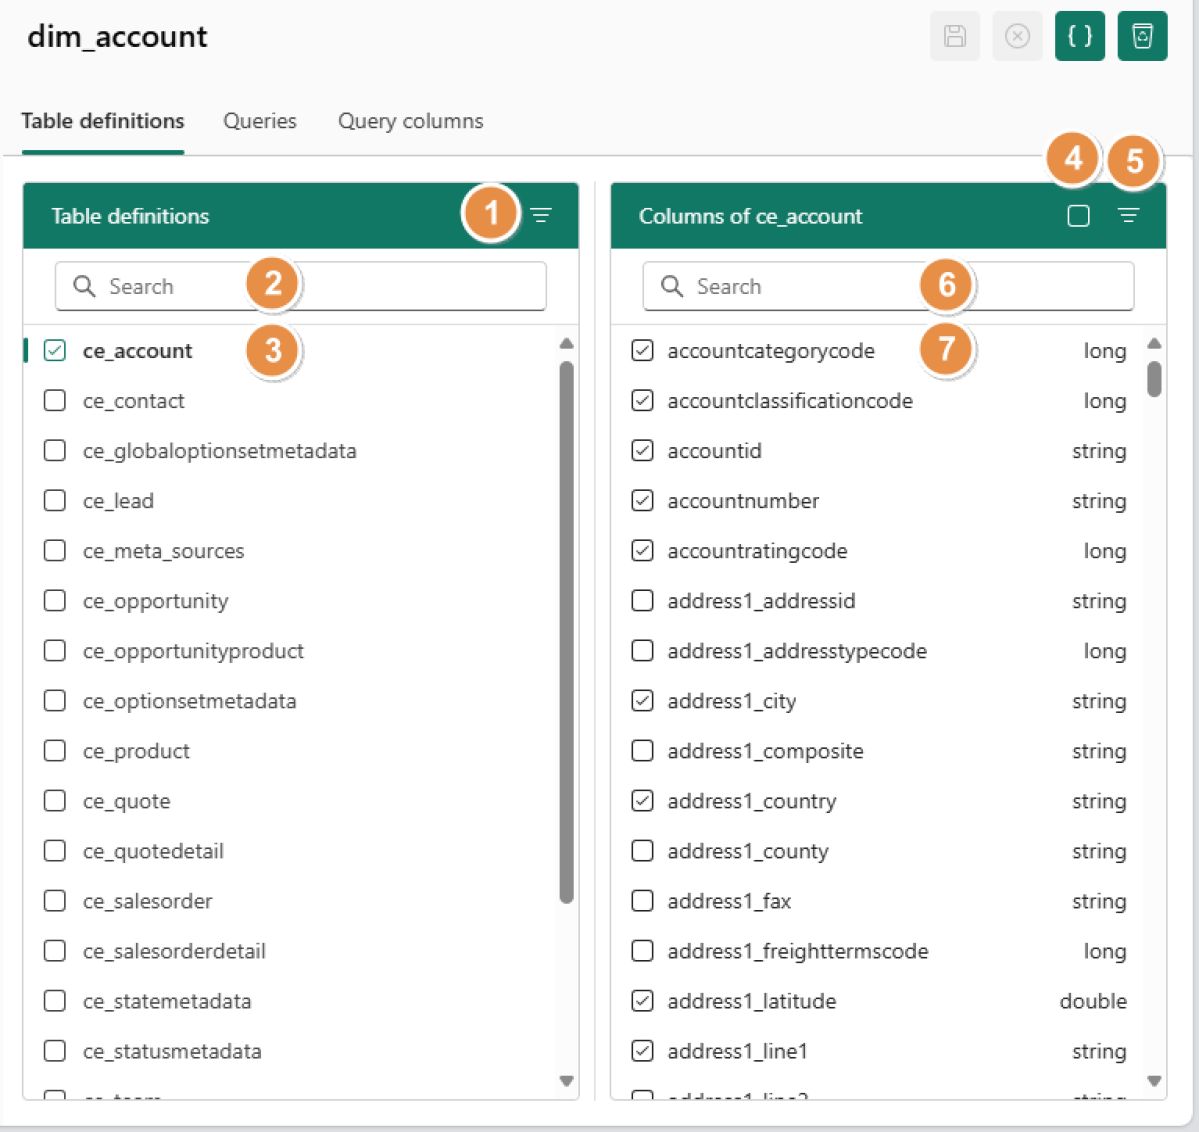
1. Filter selected table definitions
When enabled, only the selected table definitions will be displayed.
2. Search for table definitions
You can type any character into the input field, and it will search the table definition list for matches, ignoring case sensitivity.
3. Selecting a table definition
If you click on a table definition, the details of the table will be displayed on the right-hand side. The table itself is not yet selected because one column is mandatory.
4. Enable all columns
When clicked, all columns will be enabled or disabled.
5. Filter selected table definition columns
When enabled, only the selected table definitions column will be displayed.
6. Search for table definition columns
You can type any character into the input field, and it will search the table definition columns list for matches, ignoring case sensitivity.
7. Table definitions column list
A list of all available table definition columns is displayed. When you click on a column, it will be enabled or disabled. If it is the last or first column, the table will also be enabled or disabled.
Queries
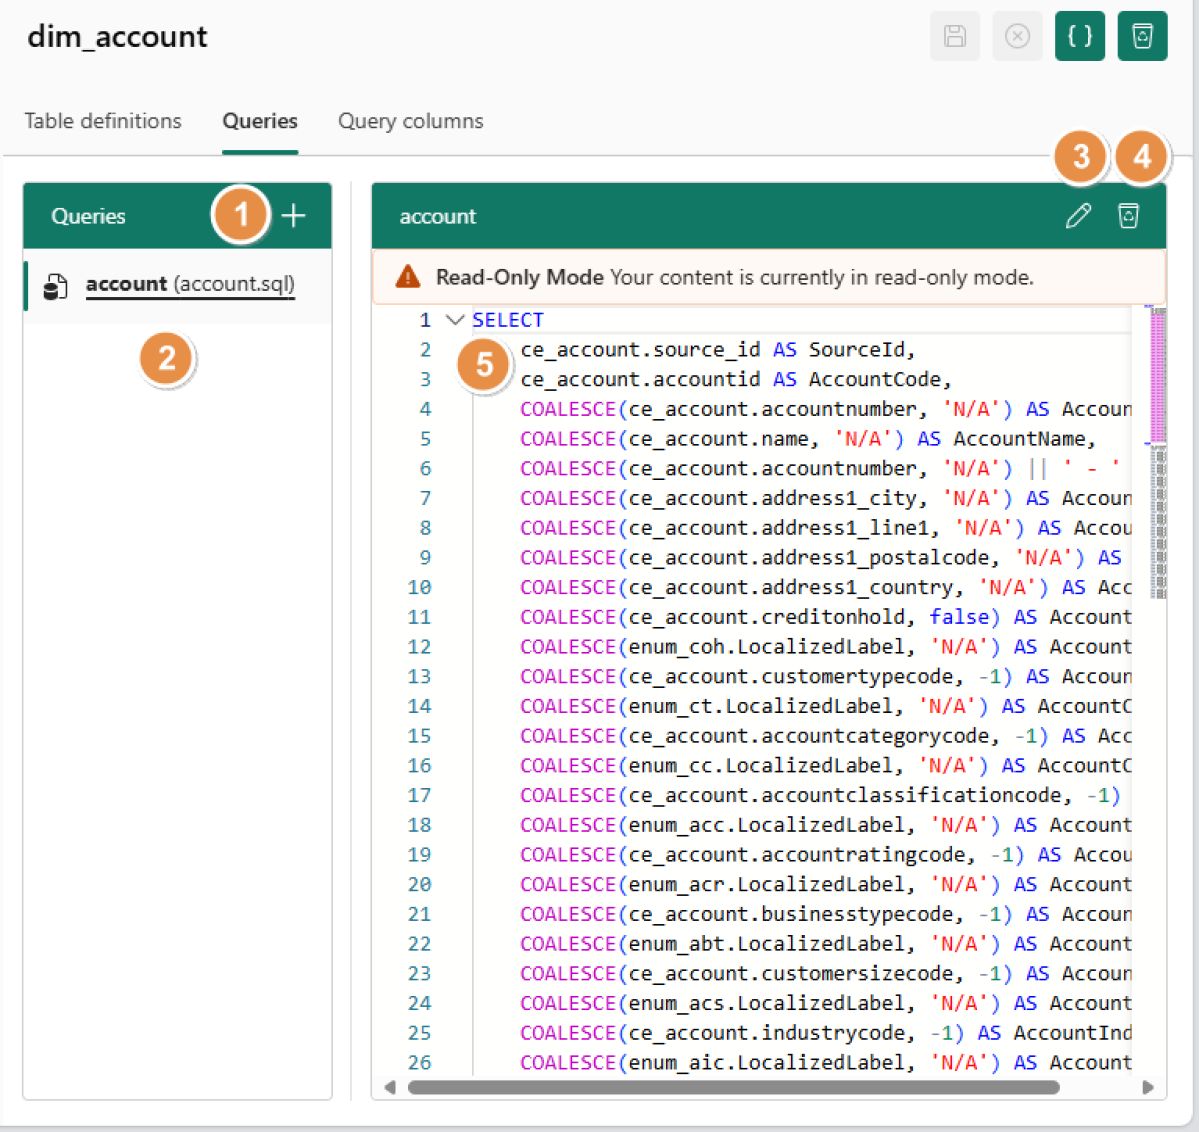
1. Add a query
You can add a query by clicking on the [+] button. A dialog will be displayed.
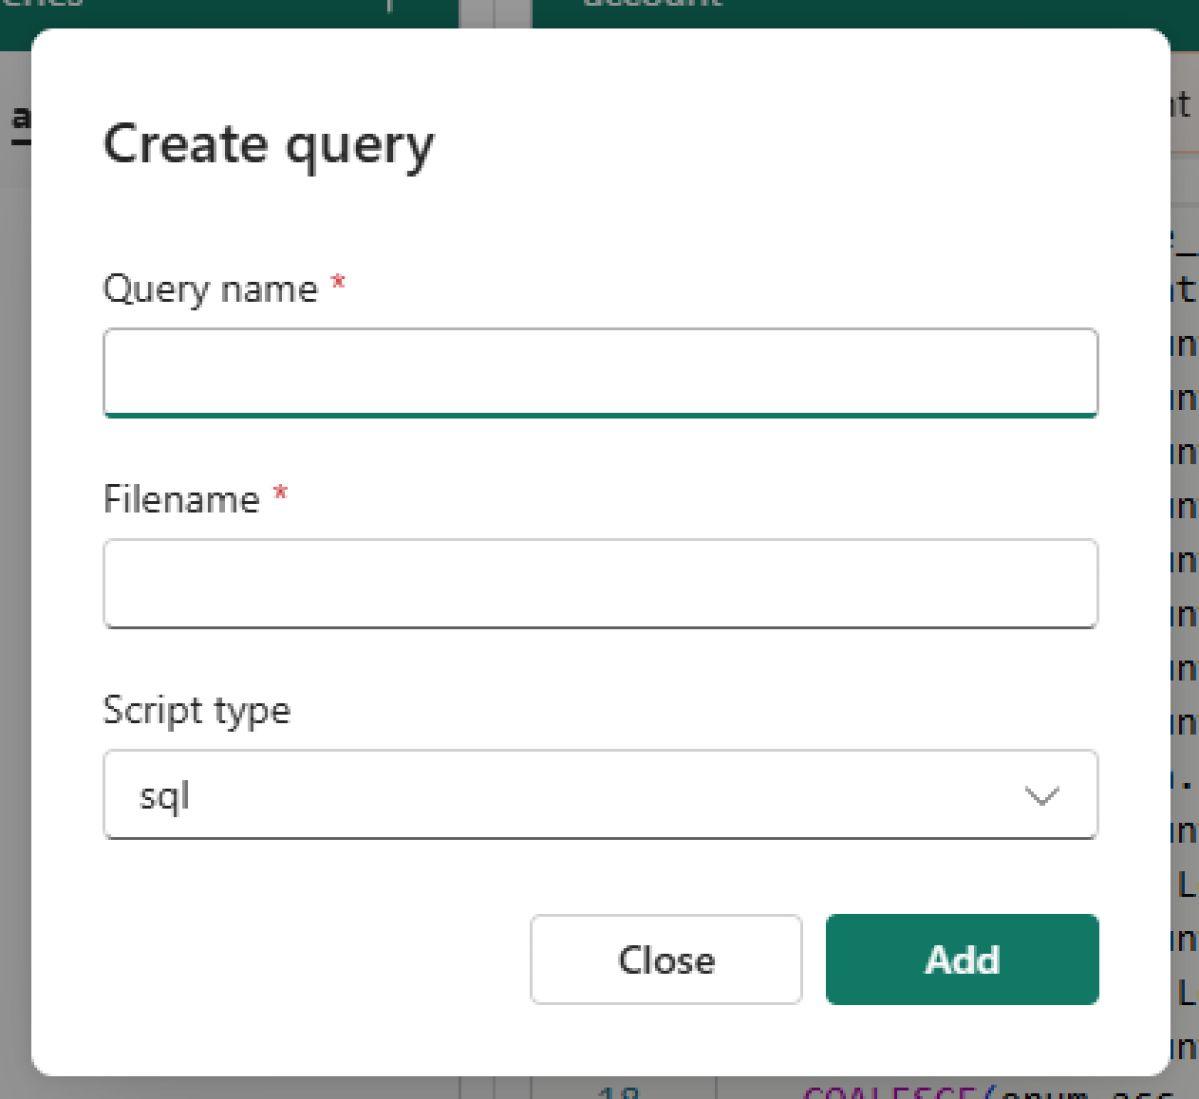
The dialog will prompt you to provide the queryname, filename and scripttype. All fields are mandatory, and the name and filename must start with a letter or underscore, containing only alphanumeric characters or underscores. Duplicate names are not allowed.
When you click [Add], the query will be created in your gold lakehouse. When you click [cancel] the dialog is discarded. We currently only support `sql` and `python`.
2. Selecting a script
You can display a script by selecting it with a click.
3. Script Readonly toggle
The script is displayed in `read-only` mode by default. You can toggle the `read-only` mode by clicking on the `pencil` icon.
4. Delete a script
Using the `bin` icon, you can delete a script. However, this will not permanently remove the script from the lakehouse until you save the component.
5. Script editor section
When the script is in `edit` mode, you can modify your script. The editor we use is similar to VS Code, so many shortcuts are the same.
Query columns
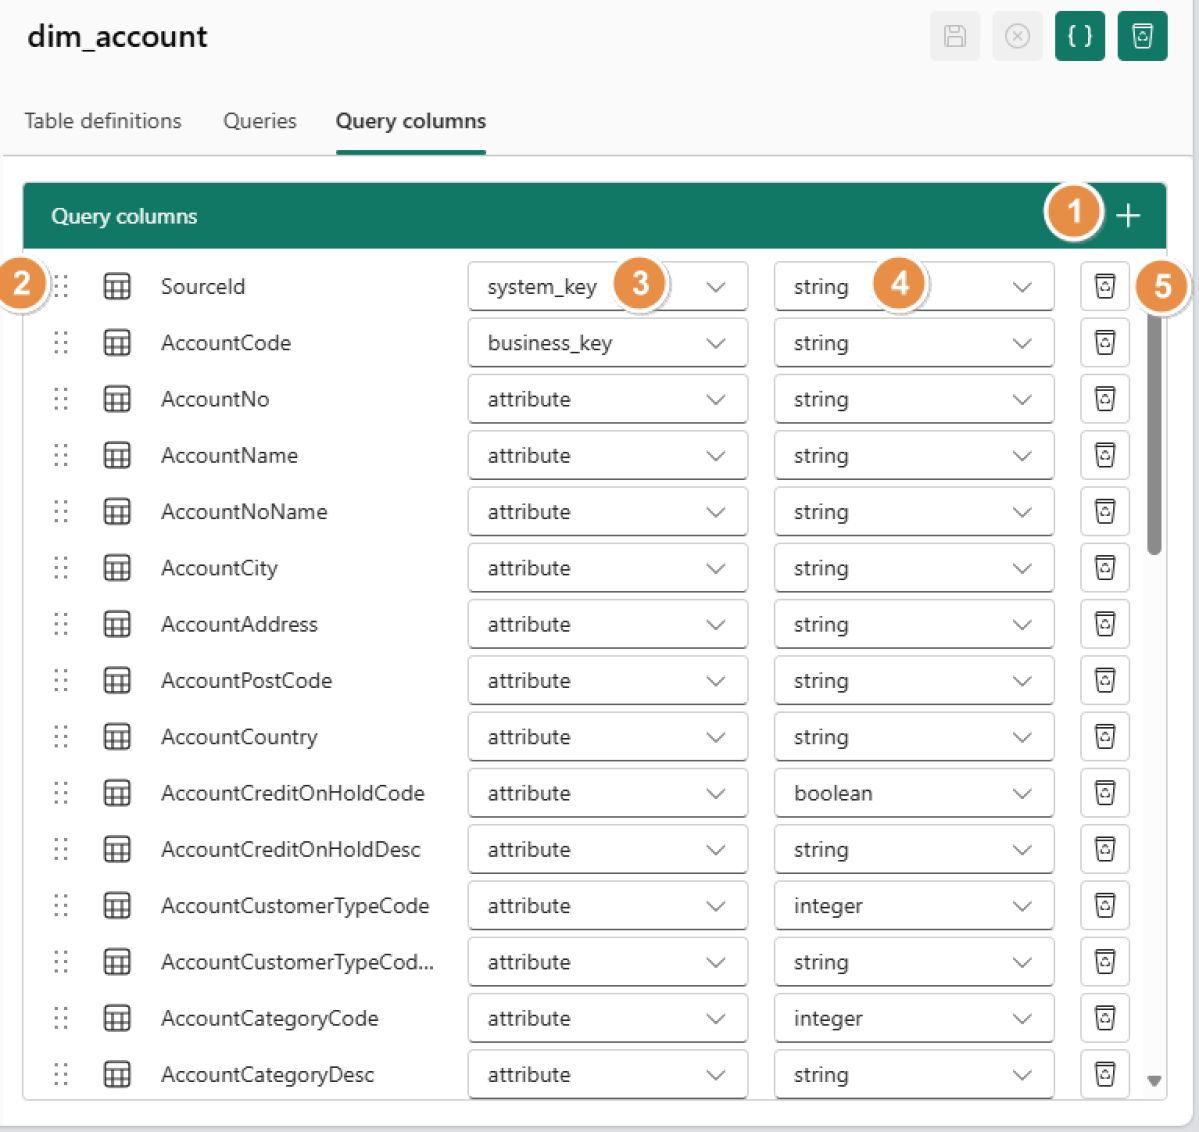
1. Add a query column
You can add a query column by click on the [+] icon. A dialog will be displayed. Duplicate names are not allowed.
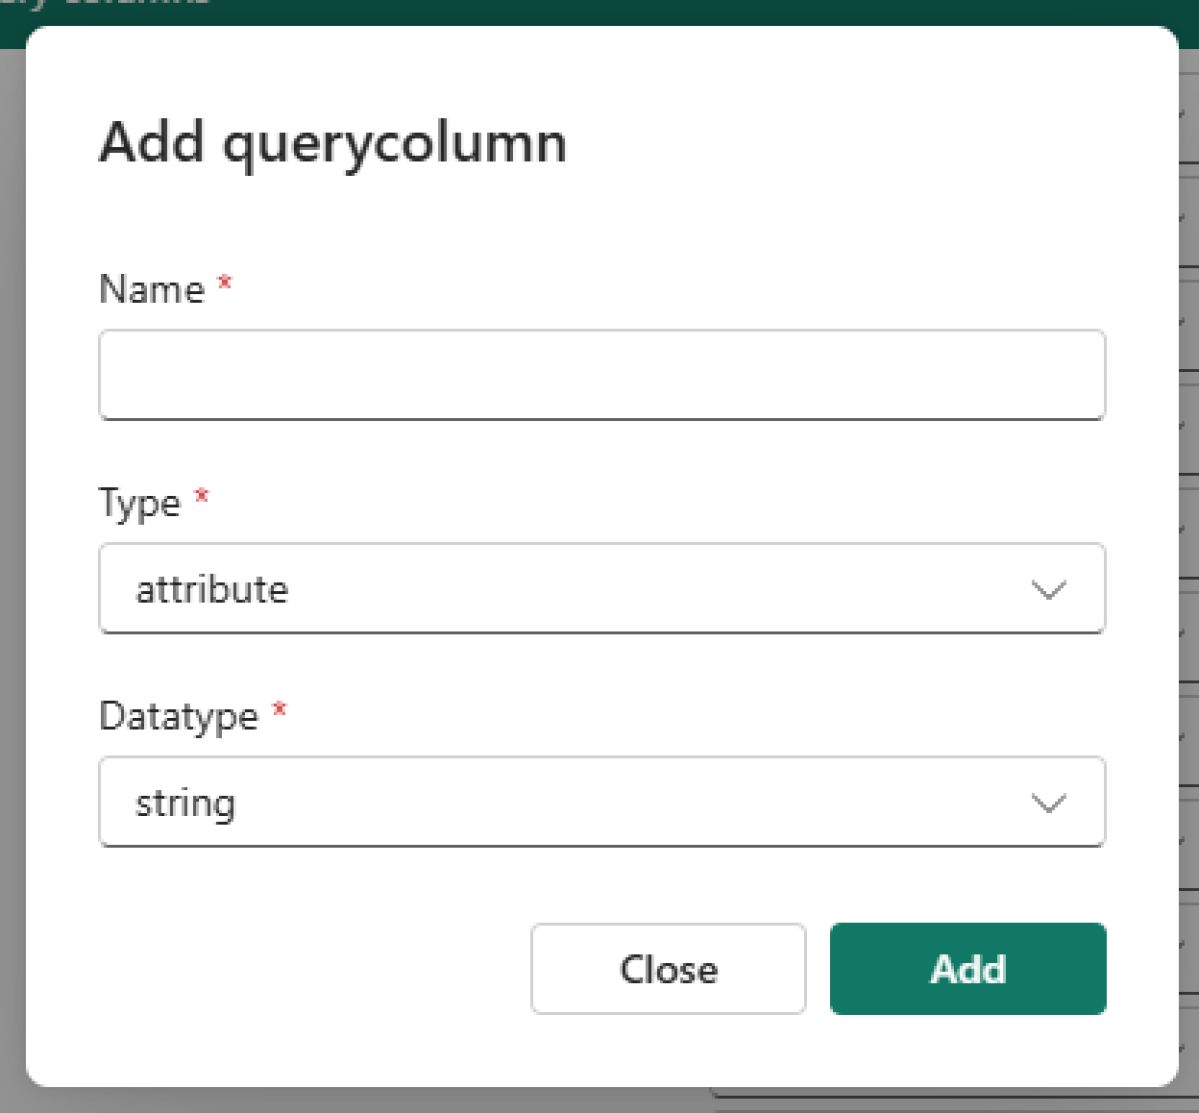
The dialog will prompt you to provide the name, type and datatype. All fields are mandatory, and the name must start with a letter or underscore, containing only alphanumeric characters or underscores.
When you click [Add], the query will be created in your gold lakehouse. When you click [cancel] the dialog is discarded. If you have a componenttype of `Dimension` or `Help` the available types are `system_key`, `business_key` and `attribute`.
When your component is a `Fact` then the available types are `system_key`, `dimension_business_key` and `measure`. Data types are consistent across all componenttypes.
2. Query column ordering
The order of the query columns is important because it determines the sequence in which they are created. You can `drag-and-drop` the columns to change the order.
3. Query column columntype
The column type can be changed after the column is created with the column type dropdown. If you have a componenttype of `Dimension` or `Help` the available types are `system_key`, `business_key` and `attribute`. When your component is a `Fact` then the available types are `system_key`, `dimension_business_key` and `measure`.
4. Query column datatype
The datatype can be changed after the column is created with the datatype dropdown. Datatypes are consistent across all componenttypes. The datatype you can select are: `byte`, `short`, `integer`, `long`, `date`, `datetime`, `timestamp`, `string`, `double`, `decimal`, `boolean` and `float`.
5. Delete a query columns
Any query column can be deleted with `bin` icon.
Dimensions tab
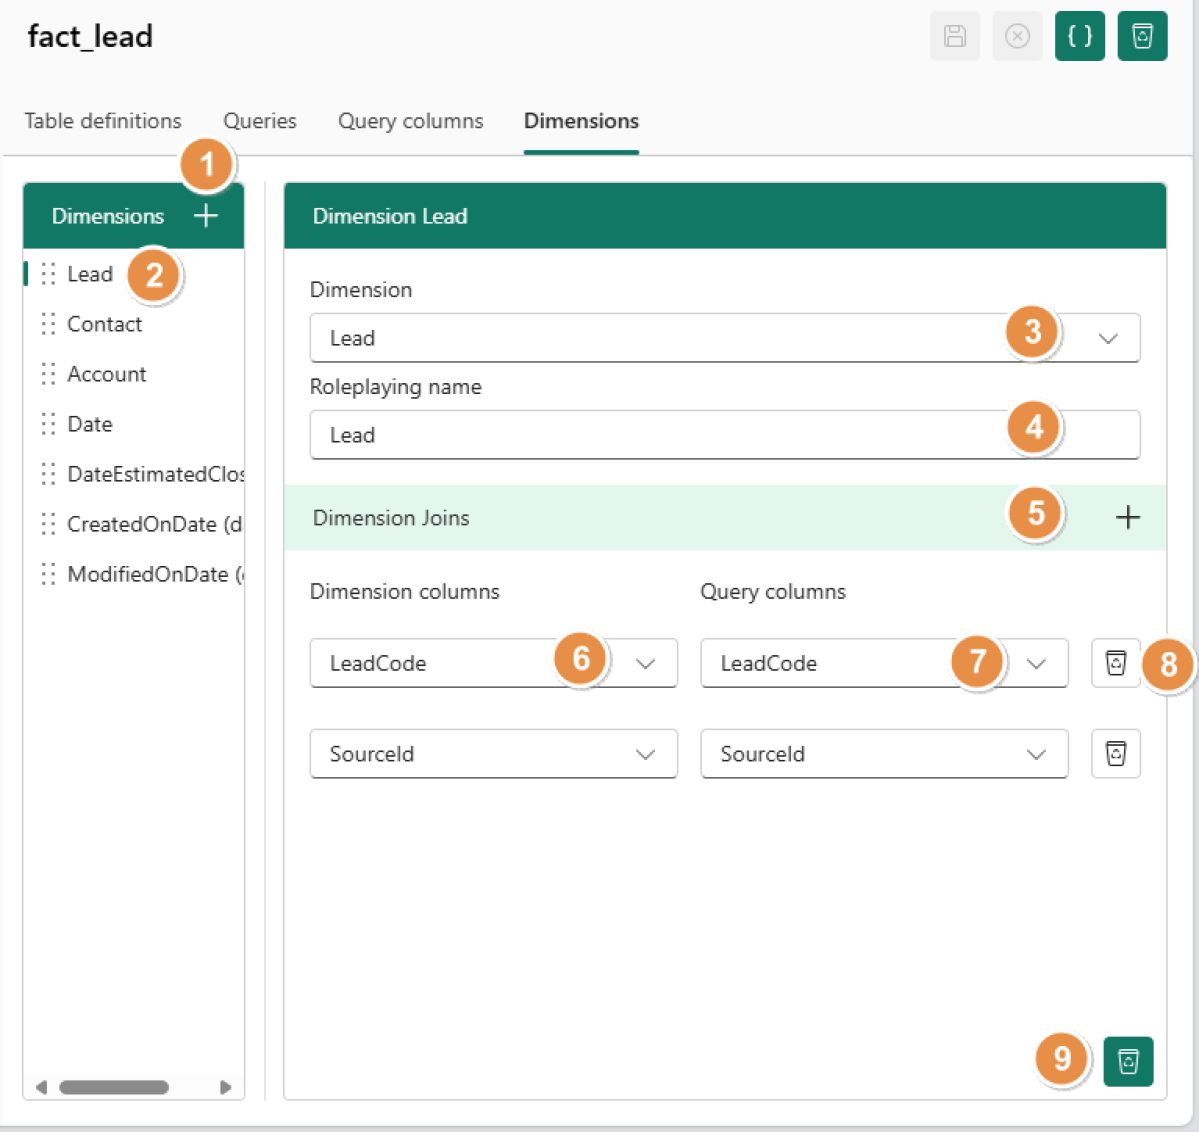
1. Add a dimension
When you click the [+] button, a new dimension is created with a default name based on the first dimension and a unique role-playing name.
2. Change the order of a dimension
You can change the order of dimensions by dragging and dropping the dimension handle to a different position. You can also select the dimension here.
3. Dimension change
The dimension can be changed by clicking the dropdown and selecting a new dimension.
4. Change the roleplaying name
The role-playing name can be changed by selecting the input and typing a new name. The name must start with a letter or underscore and contain only alphanumeric characters or underscores. Duplicate names are not allowed.
5. Add a dimension join
A dimension join can be added by clicking the [+] button, which will create a new join.
6. Changing the dimension column
The dimension column which is used for the join can be selected bij clicking on the dropdown. It will display all `business_key` and `system_key` columns of the selected dimension.
7. Changing the Querycolumn
The querycolumn which is used for the join can be changed by clicking on the dropdown. It wll display all `system_key` and `dimension_business_key` columns of current `Fact` component.
8. Deleting a dimension join
Clicking the `bin` icon will delete the dimension join.
9. Deleting a dimension
Clicking the `bin` icon in the bottom-right corner will delete the dimension.
Ask for consent
Data resides in a lakehouse within the customer's Microsoft Fabric, and we cannot access it without his approval or consent.
By clicking the consent button, we will request permission to access the datalake on your behalf. If you ignore this request, our service will not be able to access the lakehouse, and you won't be able to edit your content.
If you have already given consent, a small popup will appear to confirm this and then close automatically.
Lakehouse information
When you click the i information button in the top-right corner, details about the currently selected lakehouse will be displayed.
This includes useful information such as the name, description, lakehouse ID, and workspace ID.